

I have long wanted to run my own NAS on my [amazon_textlink asin=’B07BDR5PDW’ text=’Raspberry Pi’ template=’ProductLink’ store=’digit073-21′ marketplace=’UK’ link_id=’4067394e-0777-11e9-88b5-434ae23e439d’], and this is now finally easily achievable thanks to the people at Open Media Vault
For this tutorial, I am starting with a Raspberry PI 3, already loaded with Raspbian and SSH enabled. I have assume you can make it this far 🙂
You will need:
A USB drive (one you can format)
The first thing to do is to add the OpenMediaVault repository and grab the gpg key:
echo "deb http://packages.openmediavault.org/public erasmus main" | sudo tee -a /etc/apt/sources.list.d/openmediavault.list
wget -O - http://packages.openmediavault.org/public/archive.key | sudo apt-key add -
now let’s update the repositories grab the packages we need:
apt-get update
apt-get install openmediavault-keyring postfix -y --force-yes
When prompted for the General Mail Configuration, answer ‘no configuration’
apt-get install php-apc openmediavault -y --force-yes
When prompted for MD arrays chose all and run proftpd from inetd
Finally you should acknowledge this:

Next we need to add resolvconf:
apt-get install resolvconf
and finally, initialise the system:
omv-initsystem
At this point, you should be able to point a browser to http://yourpiname and log in with
username: admin
password: openmediavault
Change the web admin password
Don’t skip this!
To change the web administrator password, go to “General Settings” and change to the tab “Web Administrator Password:
Enter the new password and press the “Save” button in the upper left corner of the input form.
Log back in
Enable SMB / CIFS
So far, only SSH is enabled, we will want to enable SMB/CIFS to access this NAS from a WIndows machine. (Optionally, you can enable NFS if you are pure linux!)
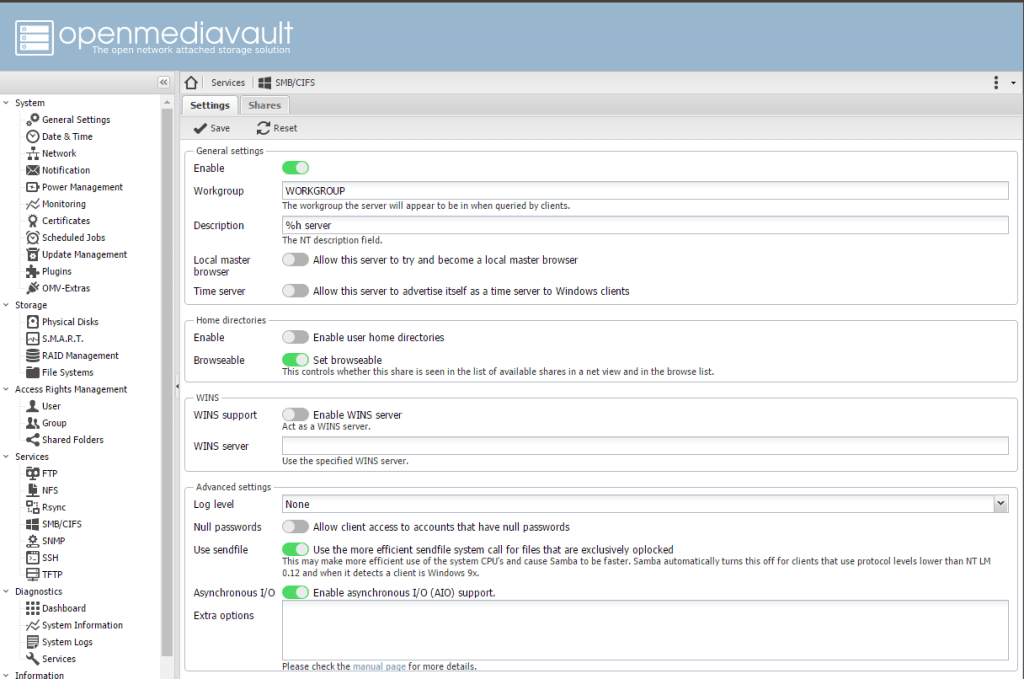
Click Save, then APPLY.
Add Storage
Now we need to add some storage… make sure your BLANK usb drive is plugged in..
You really need to be using a powered hub here, as the PI will struggle to provide enough power to spin the drive up.
Navigate to STORAGE then Physical DIsk
Select your usb disk in the list, and choose WIPE, then QUICK.
Now navigate to STORAGE, then FILE SYSTEM and click +CREATE and fill in the options, eg:
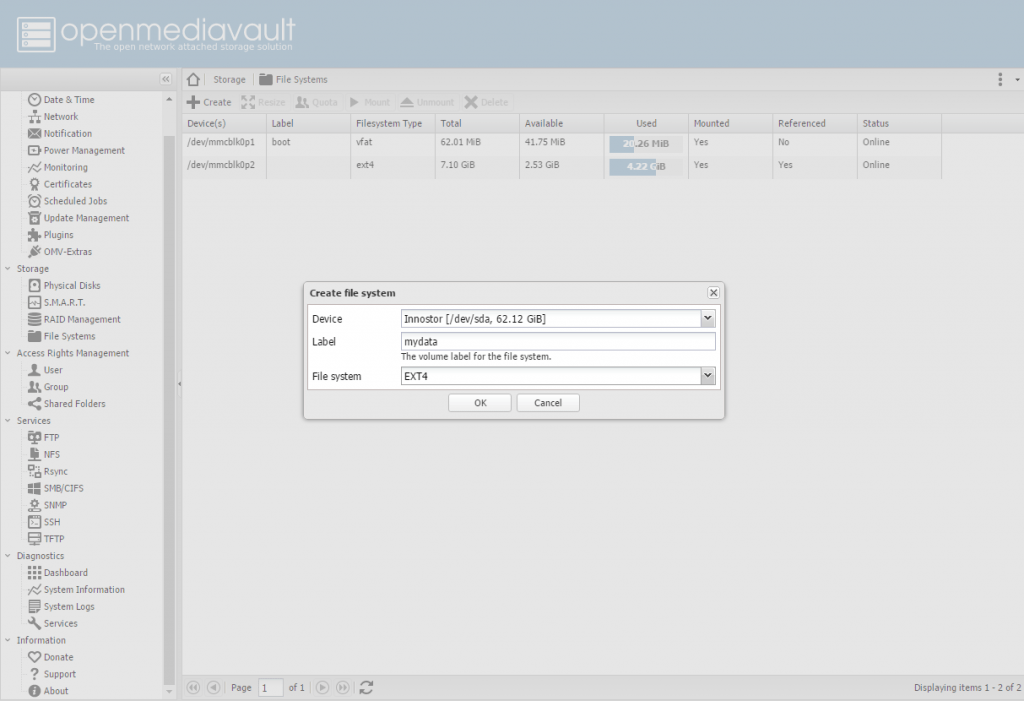
When you click OK, this will take a few minutes depending on the size of your disk
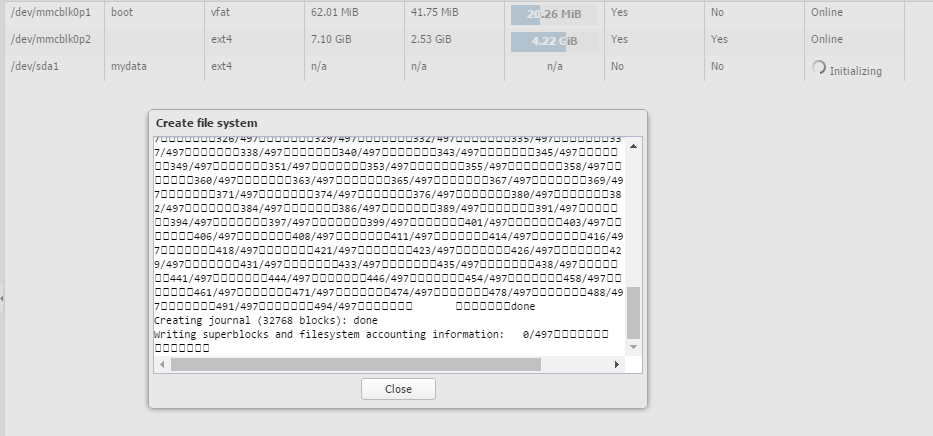
Wait for this then click finish
Select the disk and click MOUNT, you will see this message:
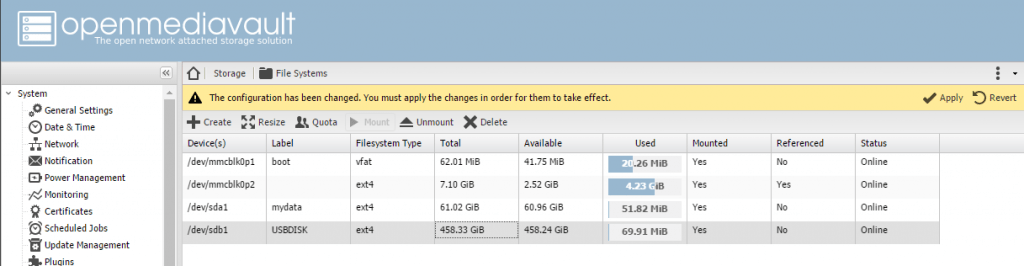
Click APPLY in the top right corner, and then OK on the dialogue box.
Add users
Now we can add a user to access your file shares. Click on “Access Rights Management” > “User” > Add:
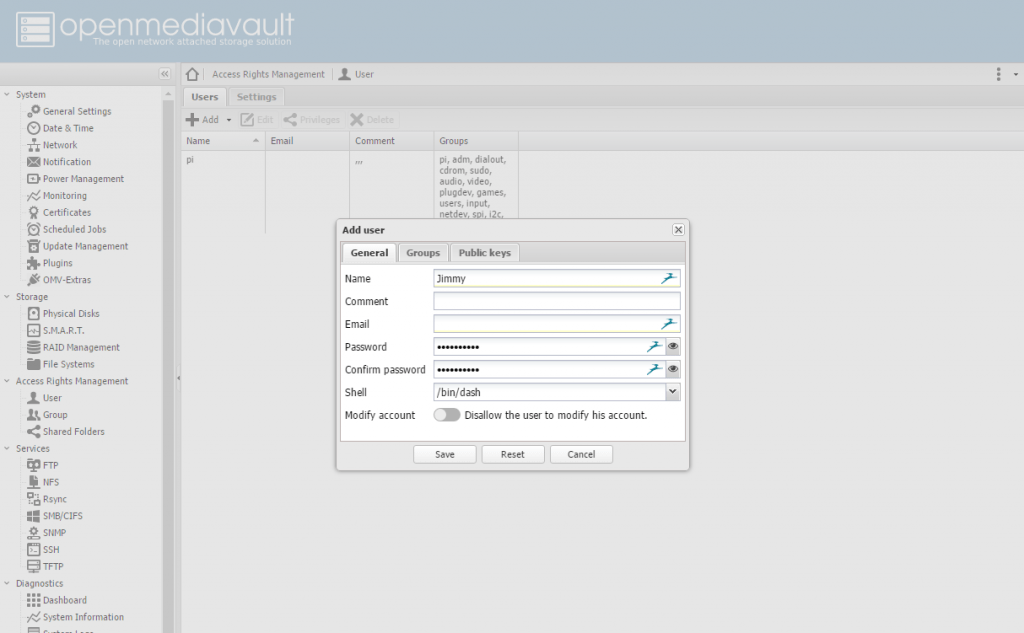
Click SAVE then APPLY
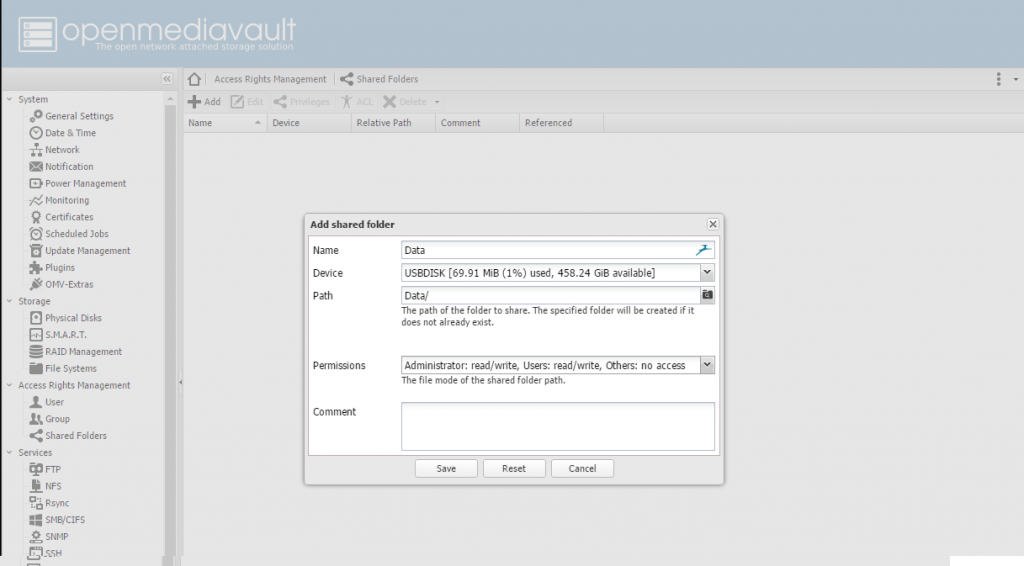
Add a file share
Next, we need somewhere to store all our files..
Click on “Access Rights Management” > “Shared Folders” > “Add”.
The next step is to grant read/write permissions to the user you just created. Click on the share in the list and then on the Icon “Privileges” in the menu above the list. This will open the privileges Window, enable “Read/Write” for the user and press save.
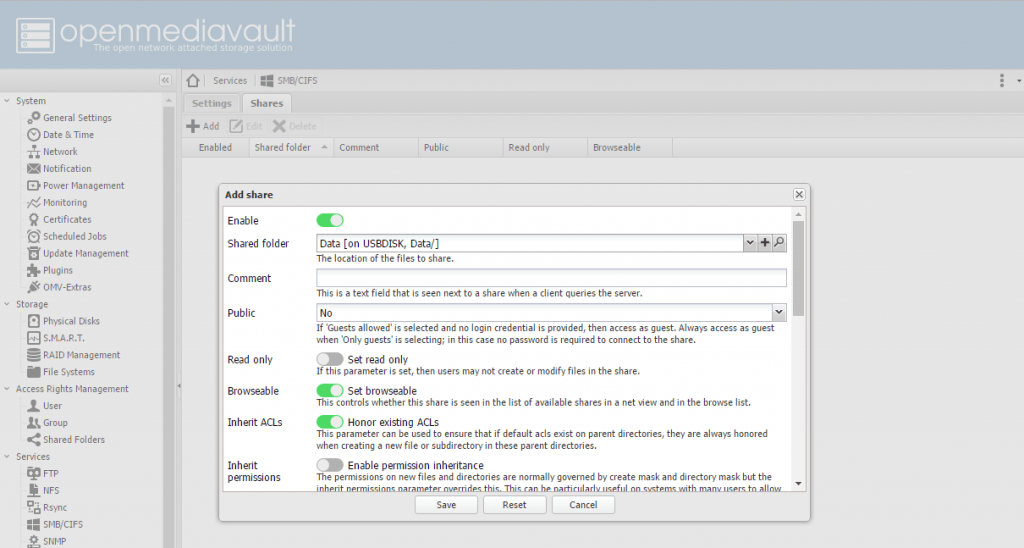
Now we need to assign the share to a service, in our case, SMB/CIFS. Go to Services > SMB/CIFS > Shares, Click on “Add”, Select the share and press save. Click Apply.
And thats it – to connect from windows, open up an explorer windows and enter
\\my-pi-name
and you should be prompted to log in using the details you created earlier. You should now see your newly created share, and be able to copy files to and from it at will.
My Raspberry pi is connect via wifi, and I only manage around 3Mb/s, I have yet to try it hardwired but I would expect this to increase significantly.
Hi Jimmy
Thanks very much for this guide – exactly what I’m trying to do!
I’m a total noob when it comes to the Pi so I’m really feeling my way. I’m getting stuck in as best I can though and am in the process of attempting to install OMV so your guide is very useful. I have a Raspberry Pi 3 b+ onto which I’ve installed Raspbian 9 Stretch.
I’ve got so far through your guide OK, but when attempting to run the following:
“apt-get install php-apc openmediavault -y –force-yes”
…I get the following error:
“Package php-apc is not available, but is referred to by another package.
This may mean that the package is missing, has been obsoleted, or is only available from another source
E: Package ‘php-apc’ has no installation candidate”
I wonder if you could give me any pointers as to why this might be occurring or how I can resolve it?
Any help would be hugely appreciated.
Many thanks
Ed
You could try this first:
sudo apt-get install php-pear php-dev php-json libpcre3-dev php-apcu
Thanks for the response Jimmy. I ran the command you suggested which completed OK. I then re-ran the original command, but it gave the same error as before.
I tried altering it to use “php-apcu” instead of “php-apc”:
“sudo apt-get install php-apcu openmediavault -y –force-yes”
…but that gives a different error:
“Some packages could not be installed. This may mean that you have
requested an impossible situation or if you are using the unstable
distribution that some required packages have not yet been created
or been moved out of Incoming.
The following information may help to resolve the situation:
The following packages have unmet dependencies:
openmediavault : Depends: php5-fpm but it is not installable
Depends: php5-cgi but it is not installable
Depends: php5-cli (>= 5.6) but it is not installable
Depends: php5-pam but it is not going to be installed
E: Unable to correct problems, you have held broken packages”
Any ideas…?
Thanks again
Sounds like a
Possible php version mismatch, I’ll spin up a new one from scratch this weekend and update the write up 🙂
Thanks Jimmy
I managed to cobble my way into getting installed 🙂 Found a guide for installing OMV 4 (Arrakis) on Debian here: https://openmediavault.readthedocs.io/en/latest/installation/on_debian.html
I did notice a few errors zipping up the screen whilst it was running but I can log on to it and it seems OK at the moment. Guess the acid test will be once I get my external drive plugged in and fired up!
Awesome, glad you got it going – I’ll update the write up soon!